Training
Back to Home
Signed Client Agreement
Upload your own, or modify ours
Your client will be required to digitally sign your agreement before accessing the portal
Client Agreement Overview
Having a signed contract / agreement for your services is the first step in officially securing a new client. This agreement needs to be signed and stored in the system. We have a built-in digital signature system, so no more waiting for your client to download, print, sign, scan, and then send back to you.
Digital Agreement Highlights
Template You Can Modify
Upload Your Own Agreement
Digital Signature with Mouse or Finger
Signature Saved to use in Letters
Required Before they can Login
The Client Portal is Mobile Friendly!
Your Clients will be able to use all the features of the Client Portal with a Tablet or Cell phone - including digitally signing the agreement.
How it Works
When you grant access to a new Client or Lead to the Client Portal, they will be presented with the agreement to sign before gaining access.


Client Logs into the Client Portal
This is where you can access our default agreement and customize it to your liking

Your Agreement Fills the Screen
The Client has to sign the agreement before they can continue to the rest of the portal.
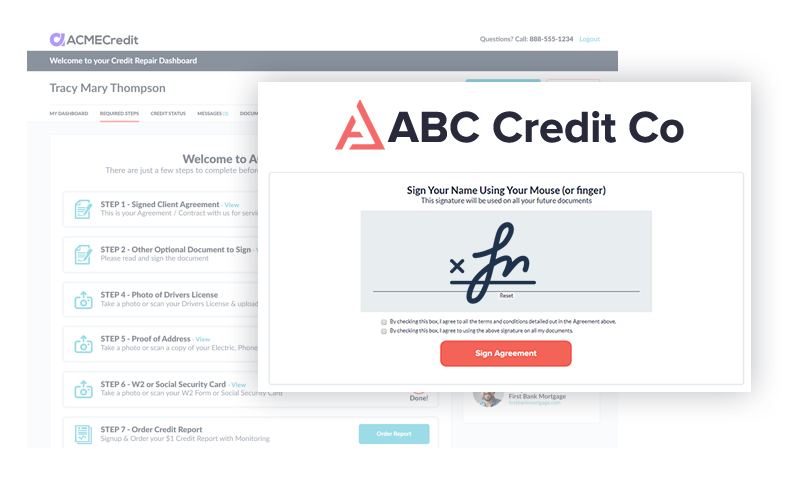
They Digitally Sign the Agreement
If they are on a desktop, they use their mouse to sign their name, and on Tablet or Phone, they use their finger.
What Happens Next...
After Signing, the Client Gains Access to Portal
Client Will be Taken to the "Required Documents" page
You Will Get an Email Confirmation that the Agreement is Signed
A Copy of the Agreement will be stored on the Client's Account
Customizing the Agreement
We have included a default standard agreement for services, which you can leave as it is (will automatically pull in your Company and Client information) - or you can completely replace it, and use our Variables to insert the customer data from their account.
Go to: SETTINGS > CREDIT REPAIR > AGREEMENT

Toolbar Editor
Using the toolbar, you can change how the agreement looks, and also get access to the "source code" if you want to make any more advanced changes.
Variables
You can auto-insert the customer's data by clicking your mouse in the spot you want it to appear, then then go to the floating panel on the right and select the data you want to display - example: "CLIENT_FIRST_NAME".
The variable code will be inserted for you, and when clients see the agreement, it will be displaying THEIR name and info.
The variable code will be inserted for you, and when clients see the agreement, it will be displaying THEIR name and info.
Tip Example Title
When building an email template design, you will select a “Header” to use from the dropdown, select a “Signature” to use from the dropdown, then you will create the actual text (body) of the email.